
2016 - projects
2016 - projects
- fixing the shower
- a built in cupboard in the hall
- a greene and greene bookcase/display cabinet
- a wall to enclose the courtyard
Fixing the shower
2016, february 11th
Why me ??? Once again a major problem down to poor workmanship by a previous owner or his plumber. ![]()
![]()
I awoke a few days ago to the ominous sound of dripping. Turned out to be in our sitting room, or nearly, in a built-in cupboard in the sitting room to be precise - directly under the shower of course. Turned off the water, then how to get to it ? Apart from the cuboard itself, the only likely access was via the side of the downstairs toilet which is behind the cupboard and partly below the bathroom, but it meant demolishing the stud wall. Decided to do that, and yes, could now get at it all, but not easily. Underside of upstairs flooring clearly soaked through (not visible above as it is tiled over the floorboards). Water clearly coming from under the shower tray, but not from the outlet, that was perfectly dry.
No isolating valves anywhere, so cant put the water back on and it's a working day for Isabelle, so rush to the nearest DIY shed for 1/4 turn isolating valves and fittings. Cut into the pipes, soldered up the fittings, screwed in the valves, all fine, now we can put the water back on. By this time it's around 12h. Dripping stopped about 2hrs after turning off the water.
The shower is tiled on 3 sides and the water seemed to be coming from up against the tiled wall where the shower mixer was fitted. Removed the mixer, cut out the tiles around the mixer (thank goodness for a Bosch copy of the Multimaster) managed to get them out without breaking them as the whole room is done in the same tiles, almost certainly no longer available. Yes, clearly that's where it was coming from, the wall was sopping wet up to the level of the mixer. Horrified to find that it was just plaster board, I'd have used something more resistant, but there you go. The culprit was the joint between the bracket thingy that supports the mixer behind the wall and the pipe coming up from below. Another day gone by, thank goodness for a new shower cubicle I installed in the dressing room of the guest bedroom back in 2013.
But worse is to come, while investigating where the water had been going I found that the wall is tiled to the floor, then the shower tray pushed up against it and siliconed in. The slightest flaw in the silicon and the water runs down between the tray and the wall. I would have put the shower tray in first, then tiled down to it so that the tiles overlap the tray. Maybe I'm just too fussy !
No way to remedy that except by demolishing everything and starting again because it's tiled on three sides and so the tray is not big enough to reach between the walls without the thickness of the tiles, so repaired the bad joint, refitted the tiles around the mixer and turned the water back on with some trepidation. All OK ! Grouted up the last bits on the third day. Stuck everything back together with about 1m3 of silicon and hoped for the best. Seems to be OK for now, but the whole thing will have to be redone in time. In the meantime, there is the stud wall to rebuild, but that will have to wait to allow everything to dry out, there is a LOT of water soaked into the timbers.
And to think that the beautiful floor to ceiling tiled en-suite bathroom with his and hers basins and a walk in shower was one of the things that attracted us to the house in the first place !
It took around 3 weeks to dry everything out - toilet wall now reinstated.
A built in cupboard in the hall
2016, january 23rd
Not fine woodwork really, just a simple half lapped frame, some MDF cladding and some frame and panel doors, but it's a project...
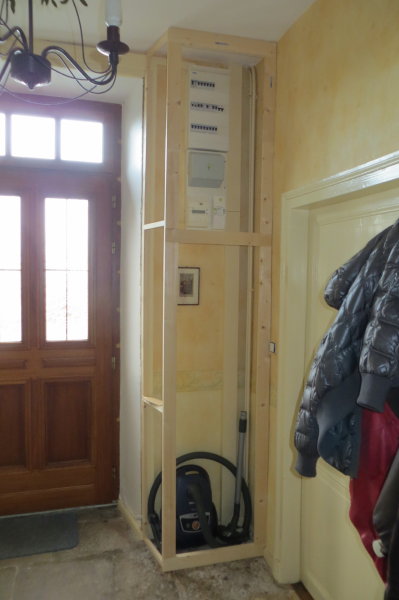
This is for our front hall. The electricity meter and distribution board are rather obtrusive and the space below tends to accumulate junk, so we decided to put a little cupboard there. First thought was a corner cupboard like the one I made recently for the loo, but sketches suggested it didnt look right there, so we settled on a face frame fitted to what will look like a part of the wall when all is finished. The face frame and doors will be painted to match the internal doors.
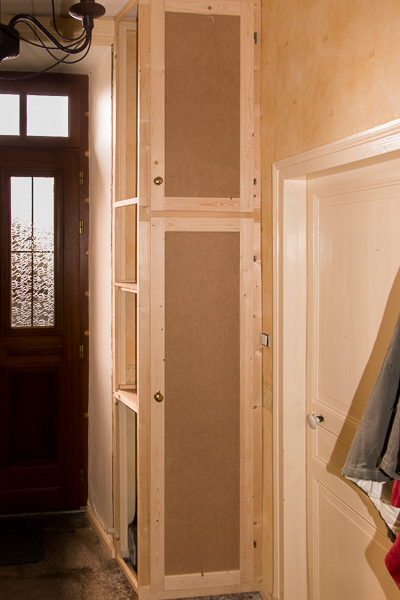
Here's the basic structure in half lapped pine.
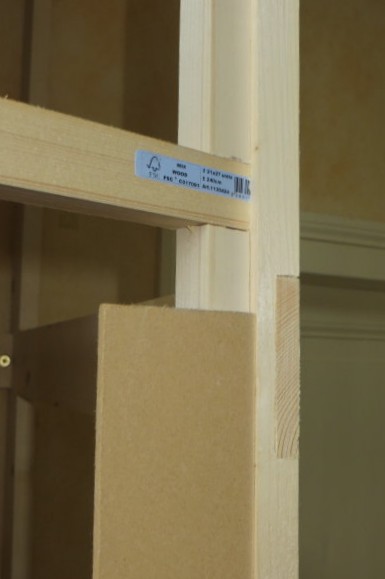
The face frame overlaps the side to cover the edge of the mdf panel and so avoid an mdf outside corner. Bit of tricky cutting there bacause the front door aperture is not square to the door. Like all the stone built houses around here, the aperture is tapered at about 15°. That meant that the side frame had to have its edges chamfered off at 15° too. Made it all square before thinking of that, so ended up running the whole assembly through the bandsaw with the table angled at 15°.
Lots of improvised supports, but it worked well enough.
Started the doors yesterday, I thought about using my cope and stick spindle moulder set, but felt that the resulting very short "tenons" might be a bit feeble for such a large door (1m70 by 55 for the bottom one) and settled on a channel for the panel at 12mm deep, and then increased the channel depth to 30mm at the ends of the stiles to give room for bigger tenons. Grooves cut with three passes on the TS (6mm mdf panels) and the blade simply raised for the ends.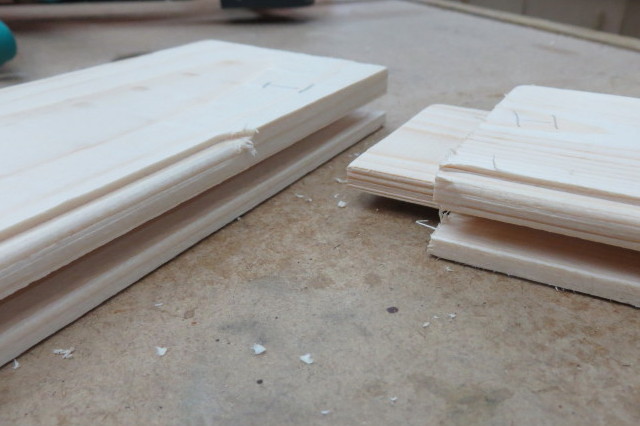
Tenons made by cutting shoulders on the TS using a cross-cut sled and stop block, then the sides cut on the bandsaw. Made a test piece in some scrap to dial in the bandsaw fence. Works fine.
")
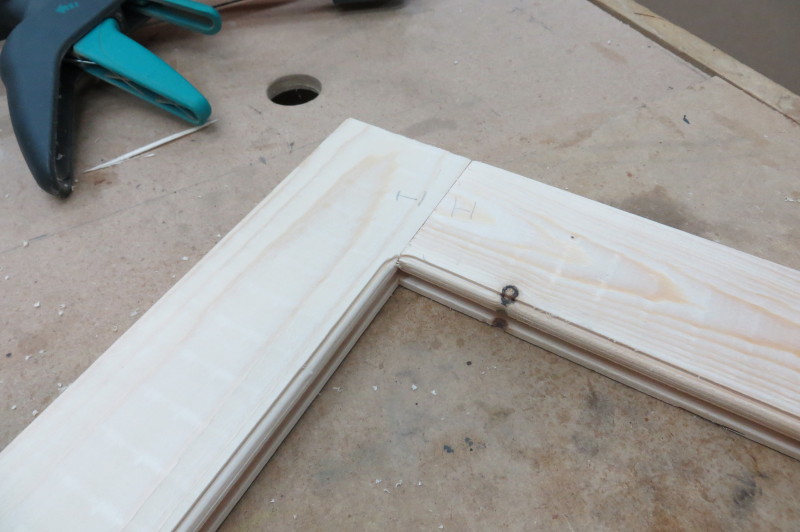
Did a dry assembly to test and to run the router around the inside front to add a bit of decorative profile - had to do that before fitting the panel as there is not enough room for the router cutter bearing once the panel is fitted.
Hope to assemble the doors tomorrow.
2016, january 29th
Doors now fitted, also a couple of shelves. I have to wait for a dry day to go fetch a panel of mdf for the side : at almost 3m tall I cant fit it in the 4x4 so will have to use the open trailer.
Didnt have the patience to cut the shelves all around the pipes and things, so cut them short of the depth and put a little upstand at the back to stop things sliding off ! They do however have a solid wood lipping to cover the mdf edge and to add rigidity - I hate droopy shelves.
The project then went on hold for a bit while we wrestled with plumbing etc as above...
2016, march 10th
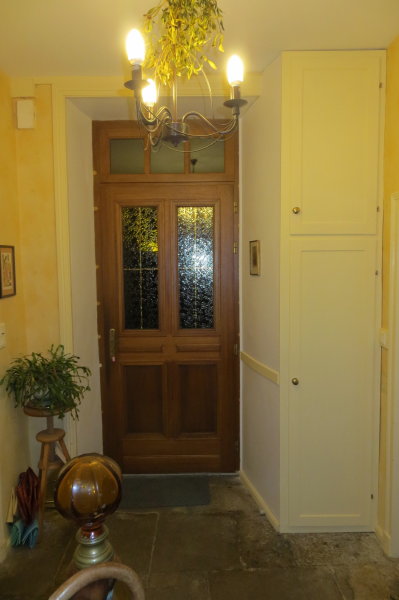
It's done ! Various reasons for slow progress - the problems with the leaking shower for example, but here is the finished job :
Quite pleased with the paint match - took a scrap of the old skirting board to Mr Bricolage and they matched it with a custom mix.
Can that really be the Xmas mistletoe still hanging from the lamp ? Oh dear... ![]()
![]()
![]()
A Greene and Greene bookcase/display cabinet
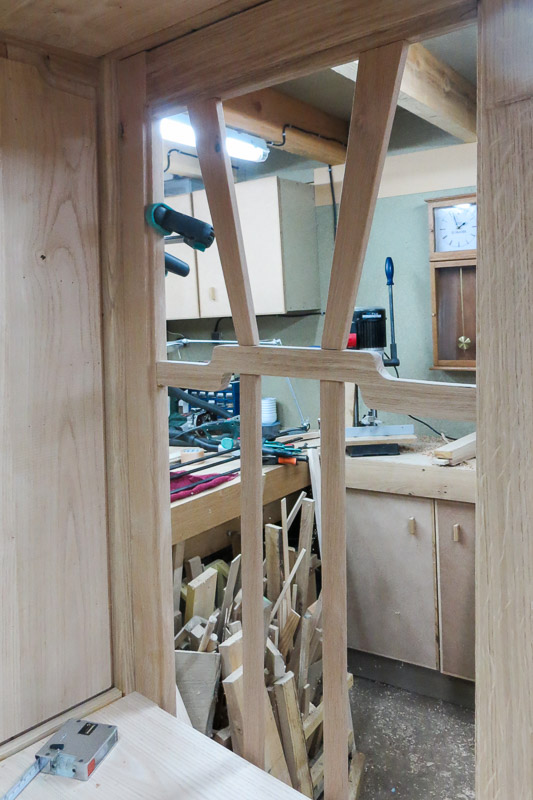
2016, march 30th
There is a space between the kitchen and the sitting room at Rue Darnet that is a bit wide to leave empty, but too narrow to put a table for example. It is effectively in the thickness of the old chimney wall that has been removed to integrate the two rooms. It is an ideal place to put a bookcase/display cabinet, so I plan to make one in the style of the american 1900's architect/designers Greene and Greene (see the Gamble House, one of their finest projects).
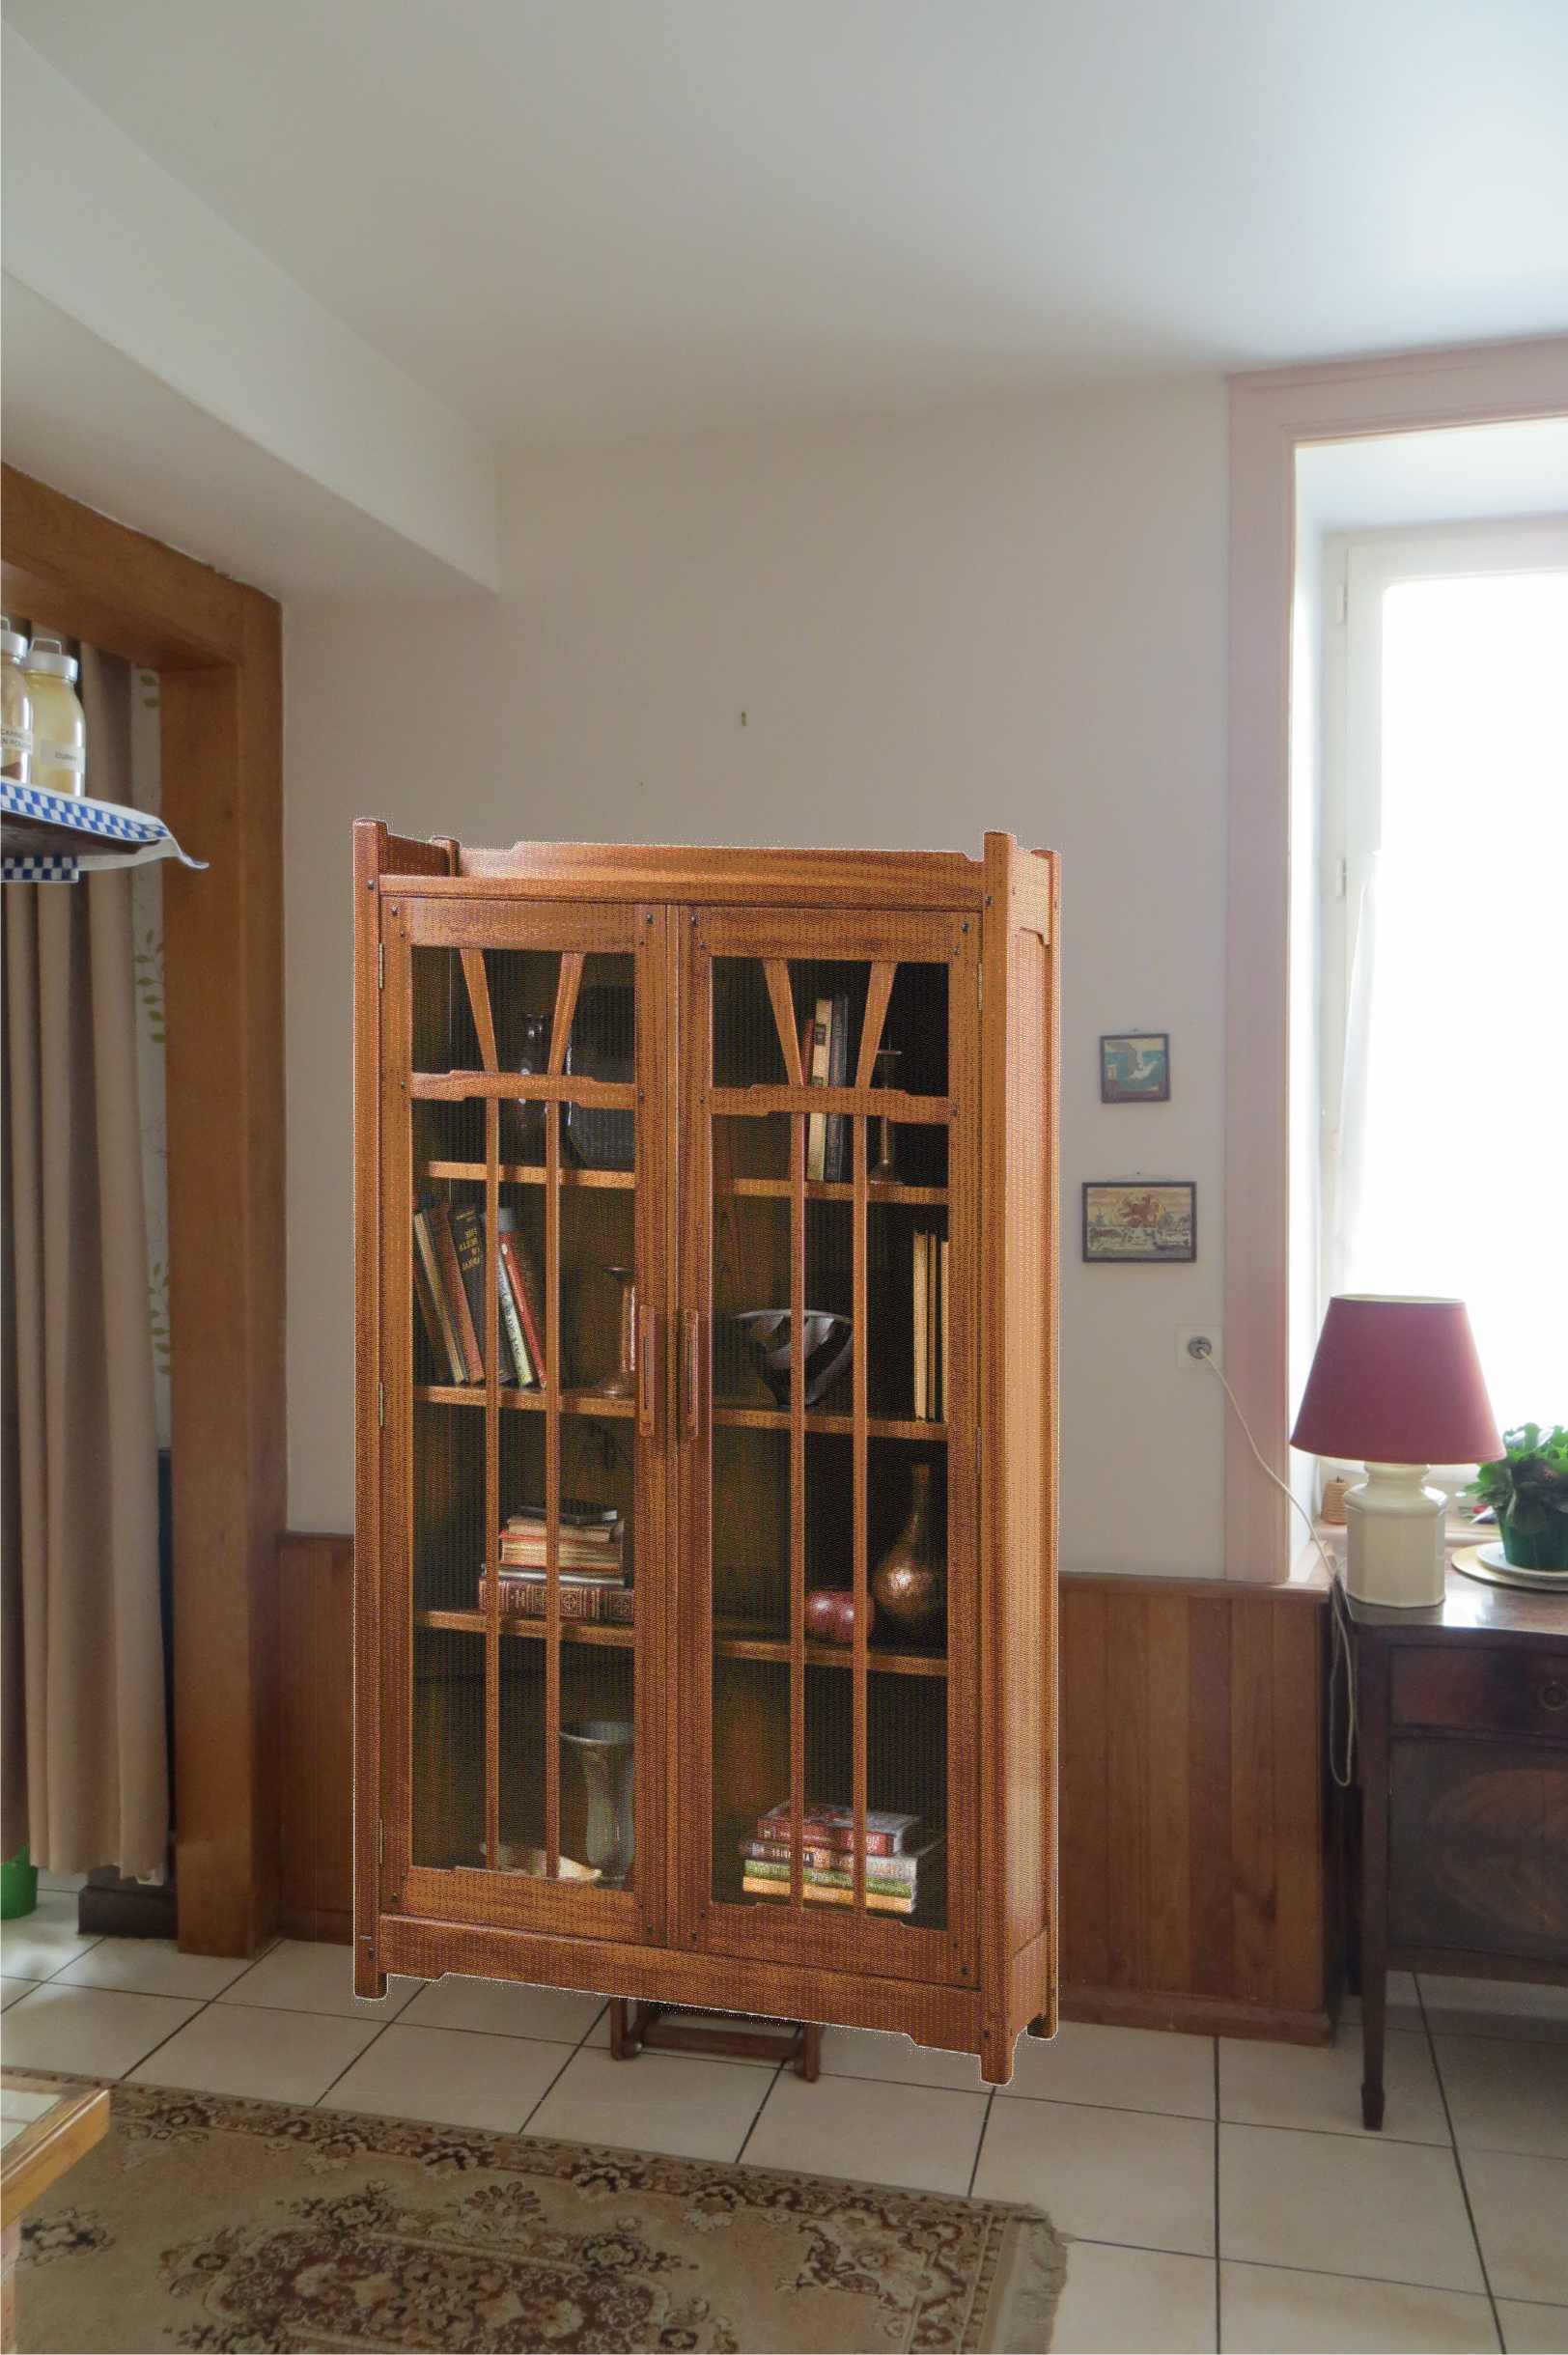
Progress so far is to draw up some sketches of alternative designs, make a choice and then make working drawings and this cut/paste illustration of the unit in place.
The curious looking thing below the bookcase is the small table that I forgot to remove before taking the photo of the background !!
It will be built in oak - I'm about to go and buy it from my local sawmill, with ebony details such as the plugs and handles.
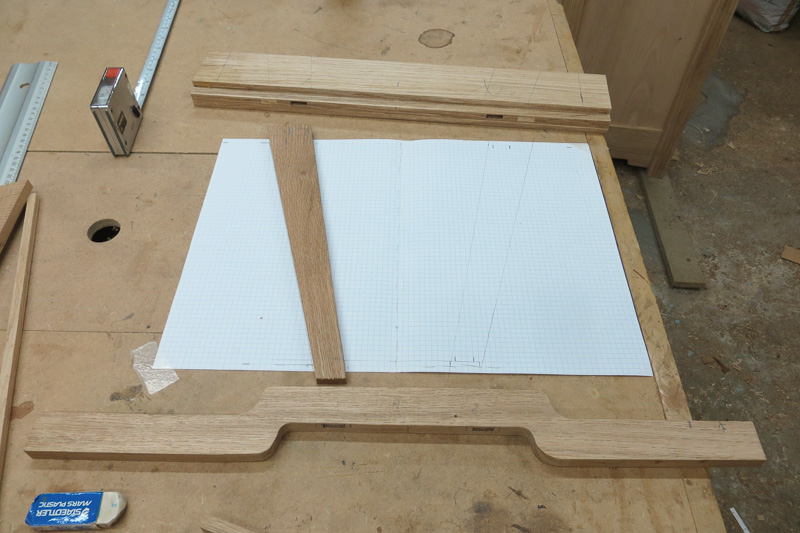
Below is the nearest I ever get to a working drawing...
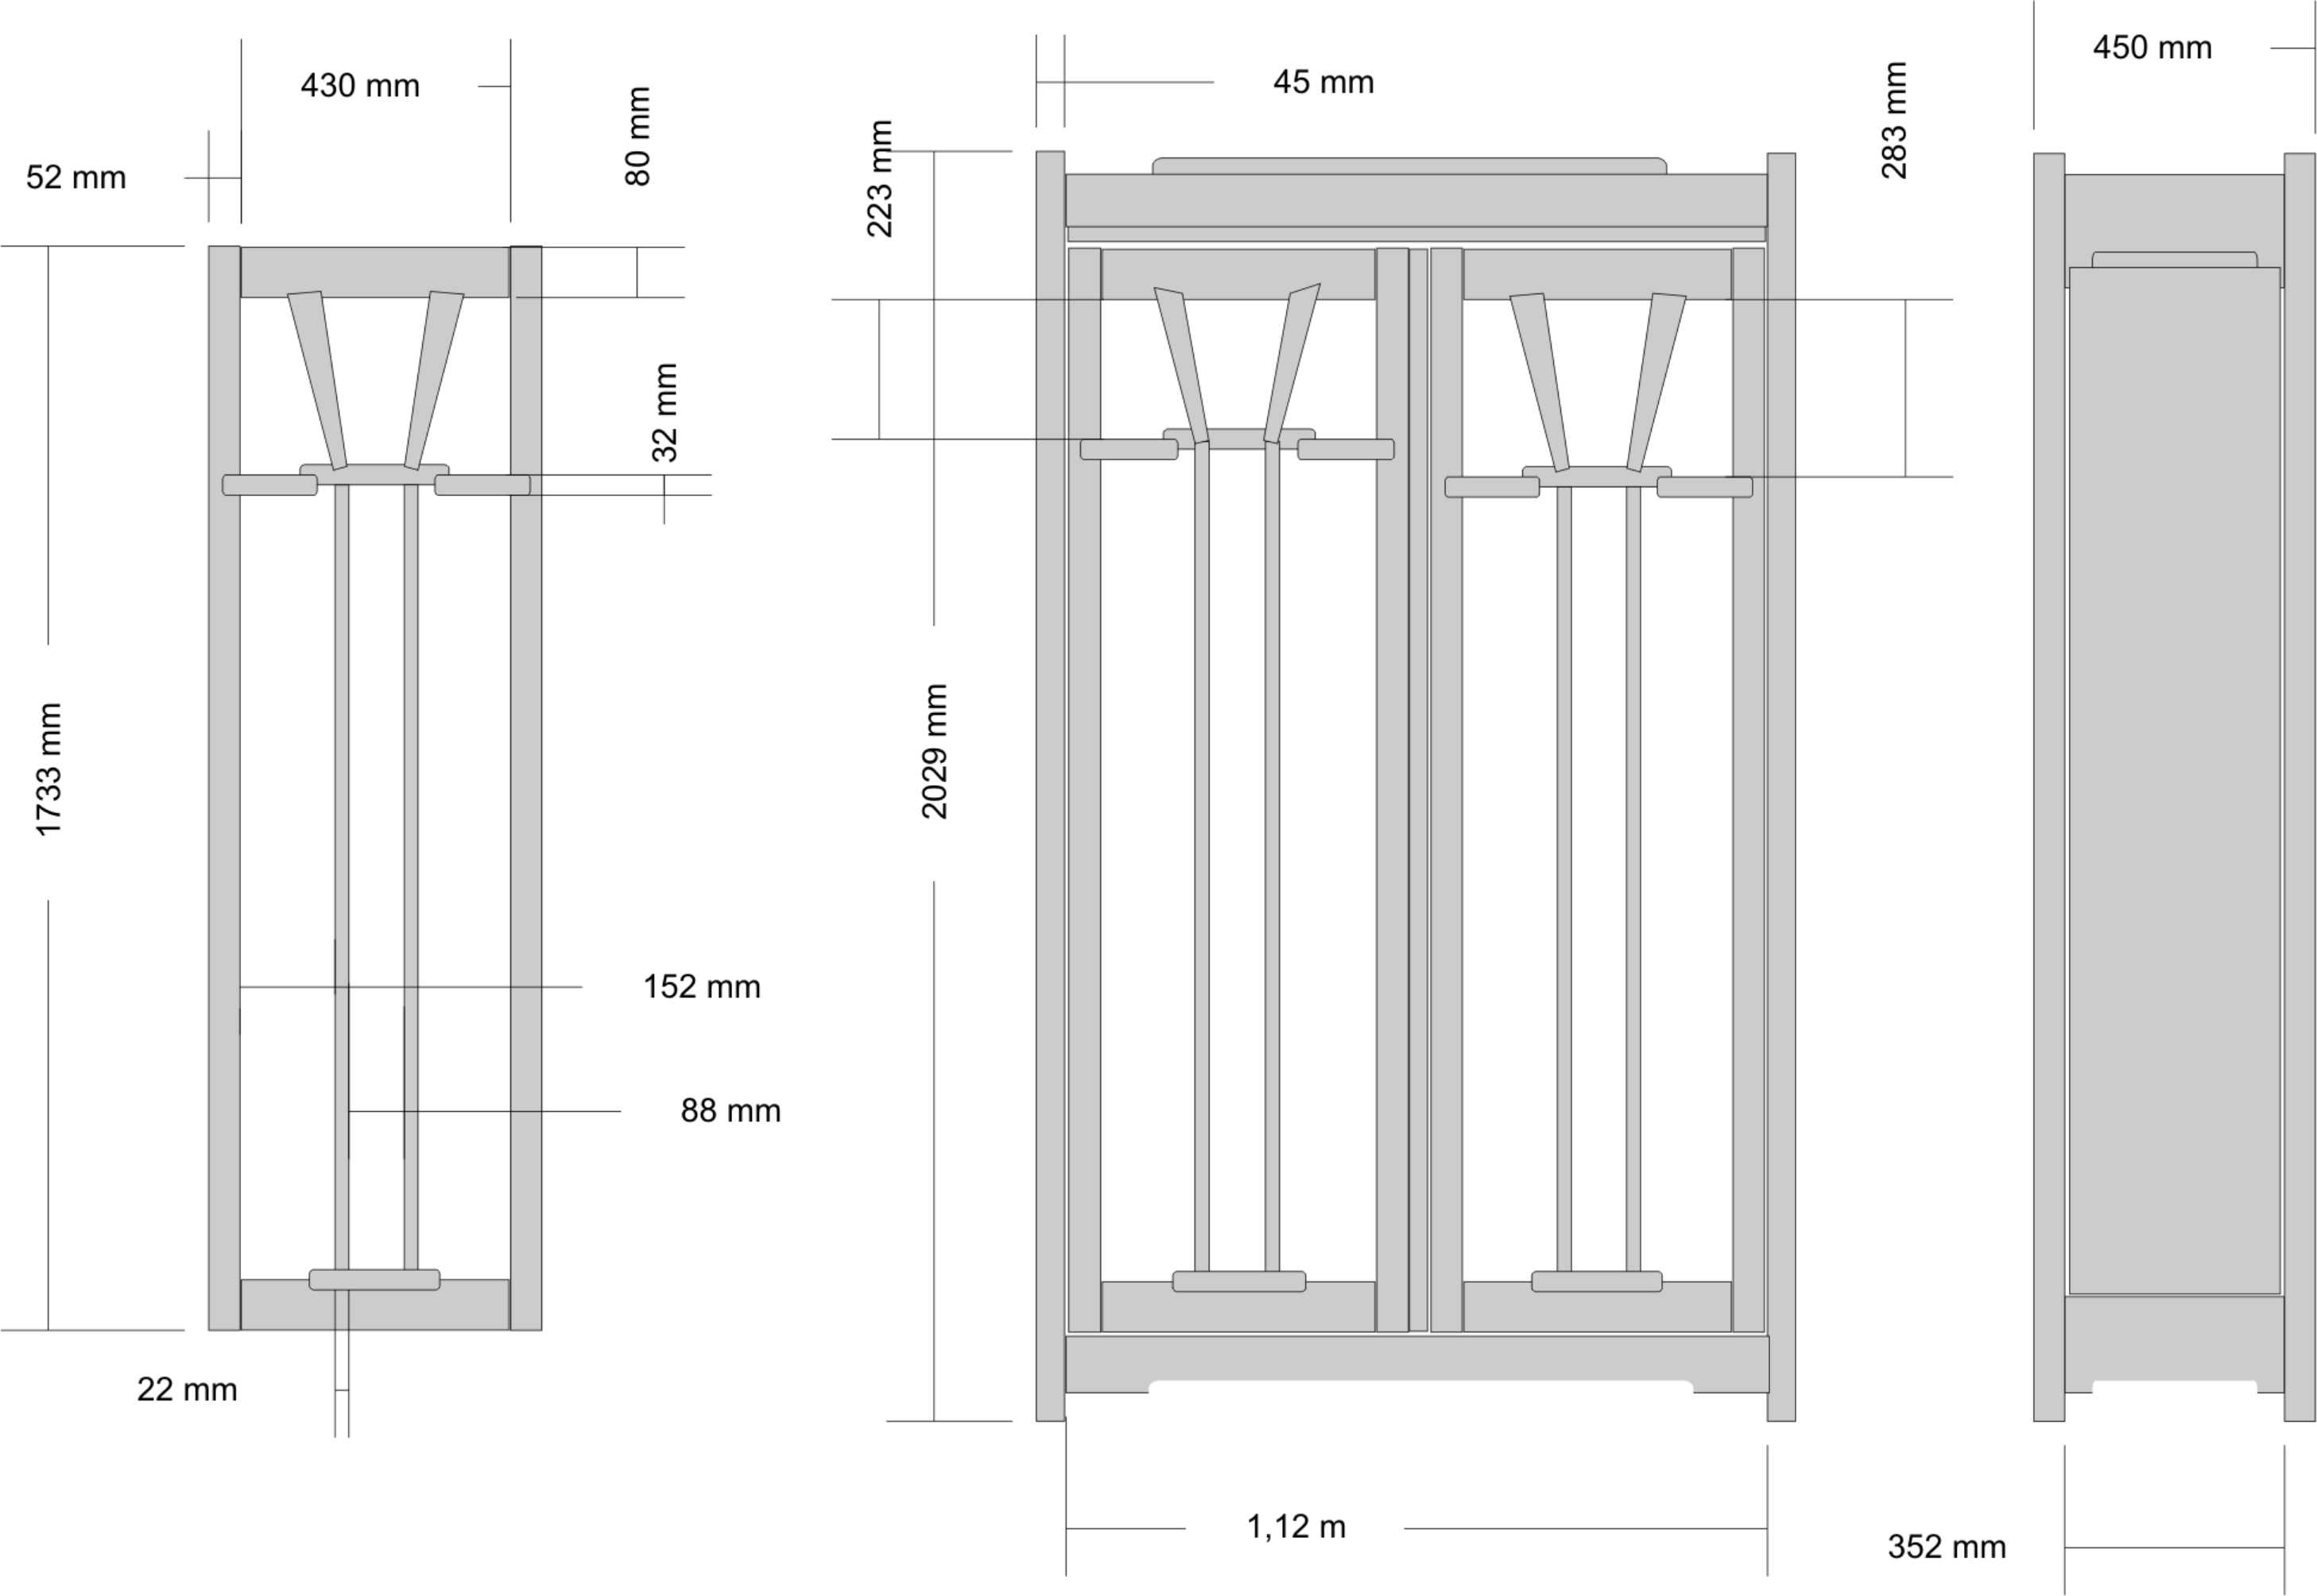
The two different versions of the door were for discussion, and we settled on the RH version.
I've just cleared the trailer of rubbish from the restoration project so I can go collect some nice locally felled white oak...
2016, may 13th
At last some progress !
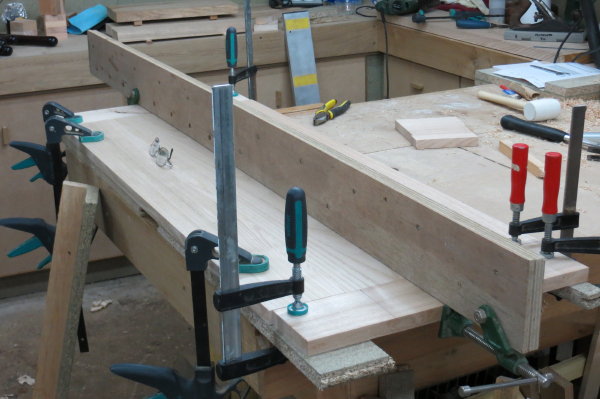
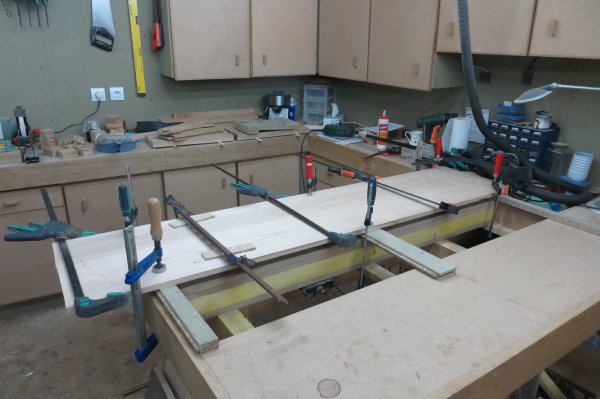
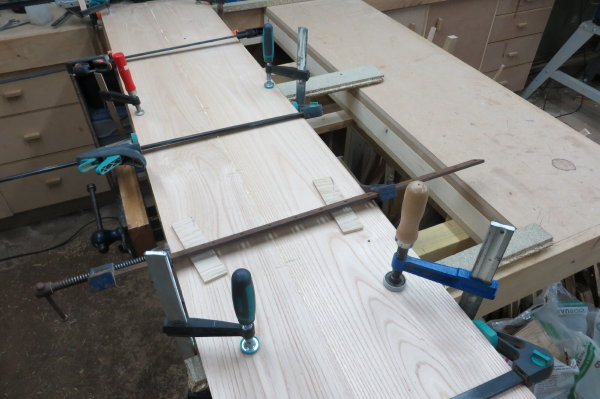
The last few weeks have seen a short holiday in La Rochelle for Isabelle's birthday, construction of two table extensions - here gluing on the breadboard ends prior to cutting tongues and grooves the full length to marry up with the table :
and - the most time consuming - work on a wall to close off our front courtyard. I had applied for planning permission (we are in a conservation area) which was granted, but had not got around to building it. Then realised in early april that the permit was about to run out, hence a rapid start. None of these things conducive to progress on the cabinet.
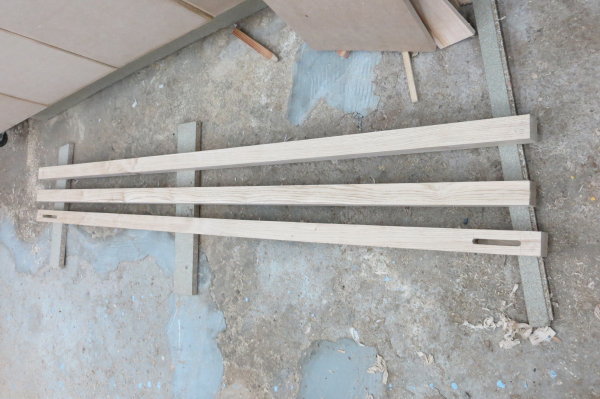
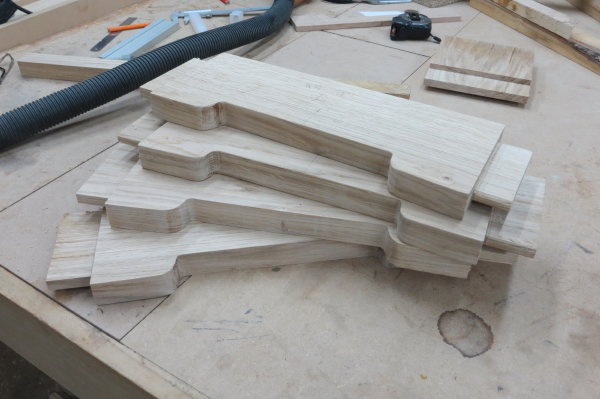
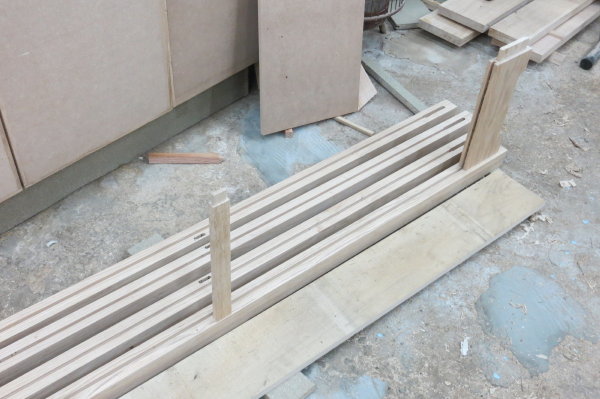
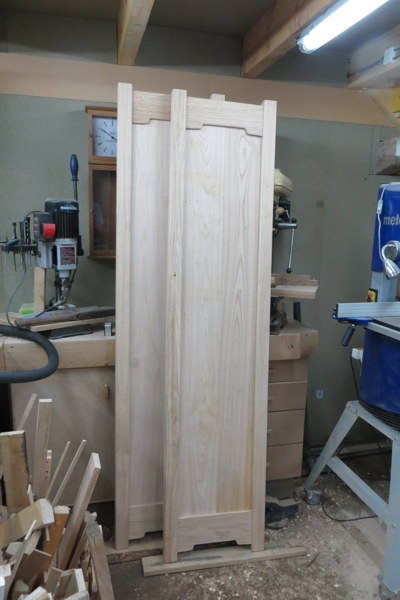
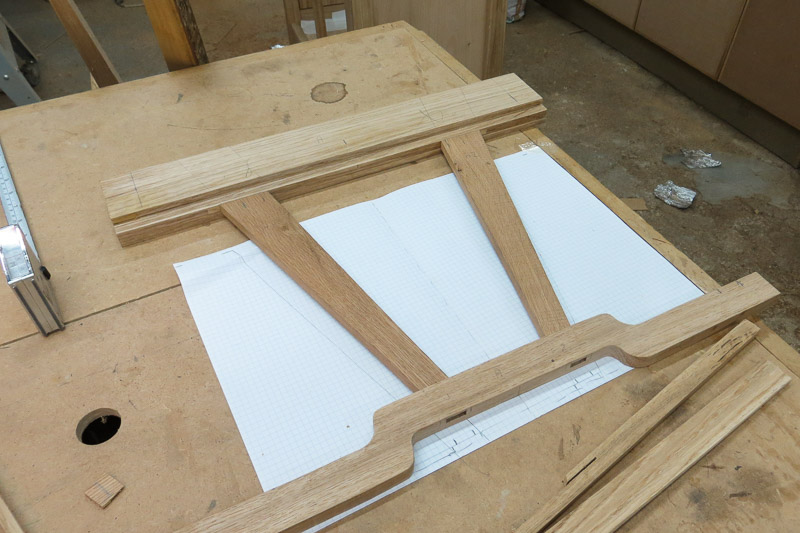
Anyhow... it's beeen raining for a couple of days, so no progress on the wall, but some progress on milling up the timber :
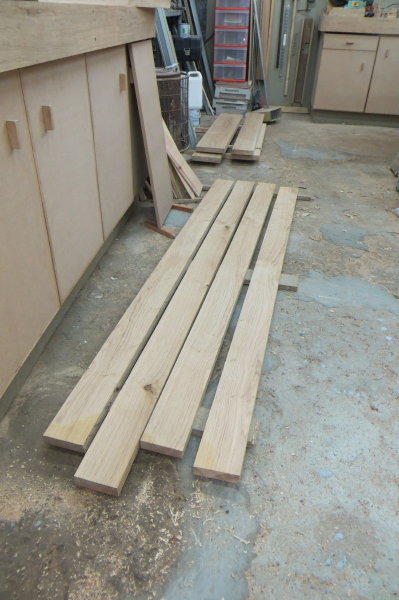
These are going to be the four 2m high corner uprights, currently 100x30, due to be ripped to 2x 50x30 and glued up to 50x60 before final sizing.
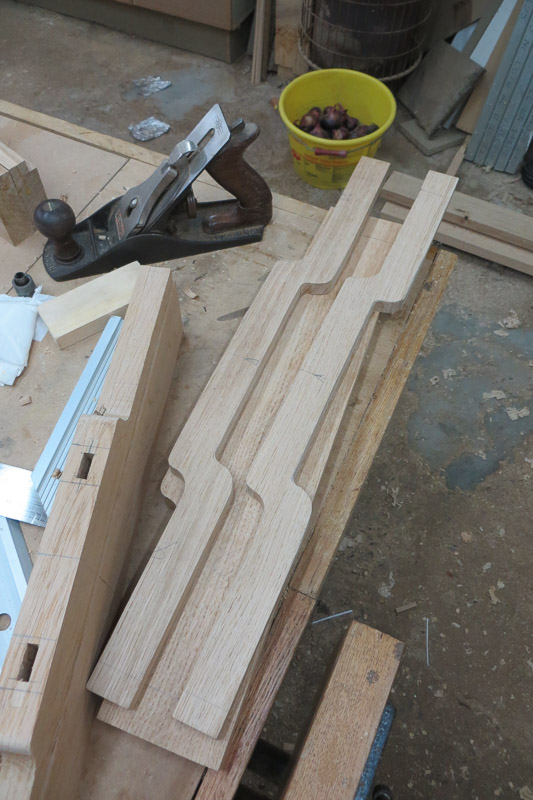
These are some of the horizontal members :
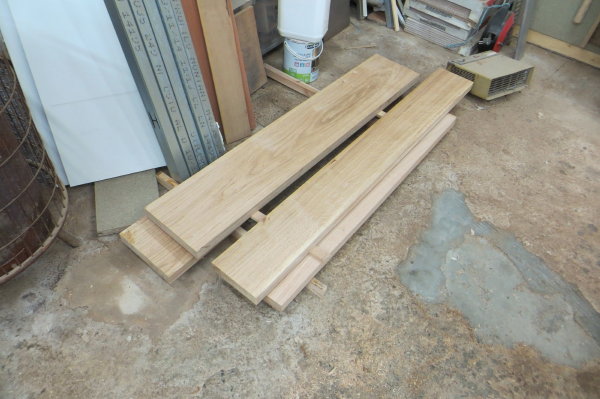
And these some of the side pieces and some bits for the doors :
I realised while milling up the 2m long corner posts that the design is very vulnerable to any bowing of these, so have decided to add a central cross member in the sides hidden behind the floating panel, and to integrate the central shelf into the structure as a brace for the front (the others will be adjustable). Feels a bit more secure !!
2016, may 30th
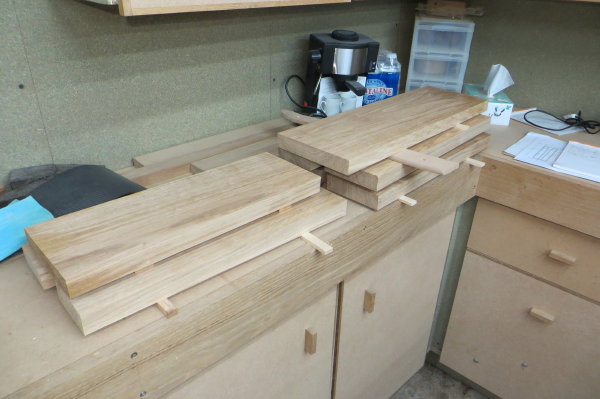
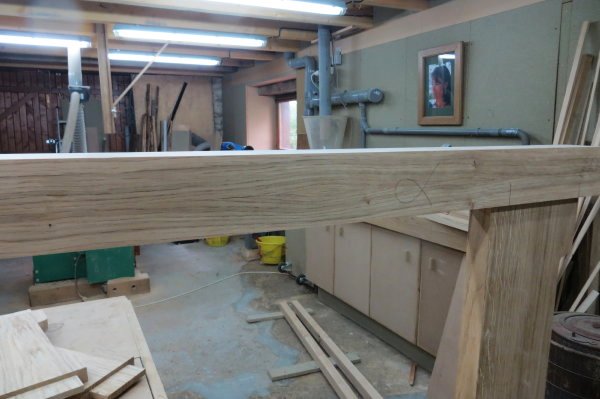
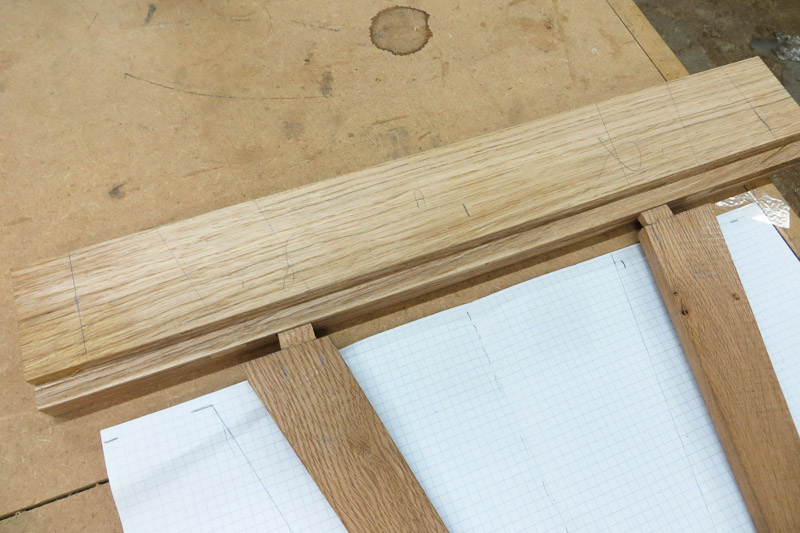
The 100 x 30 pieces were duly ripped into two 50 x 30 and then glued back together (bookmatched) as 50 x 60s. This has the effect of reversing the grain, so any tendency to warp will be largely cancelled out.
It also produces some nice grain effects, hope you can see it here :
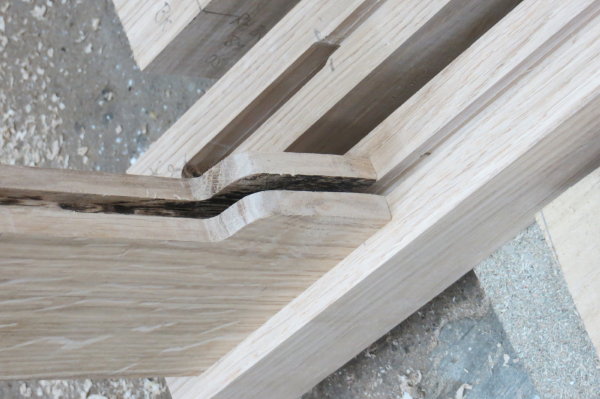
Also made the top and bottom members of the two sides, cut the tenons : shoulders on the TS with a crosscut sled, sides on the TS with a vertical tenon jig - see below (this was done before they were shaped of course, I just forgot to take the photos !)
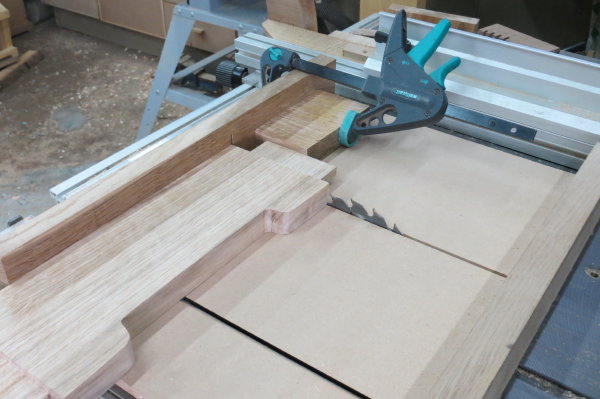
They were then shaped with the obligatory G&G cloud lifts : rough cut on the bandsaw, then smoothed out by hand with files, glass paper, spokeshave etc.
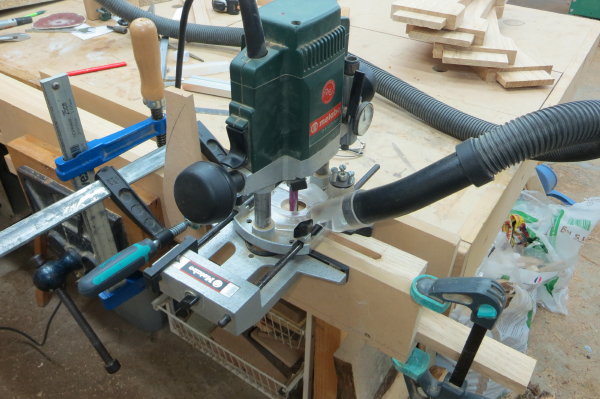
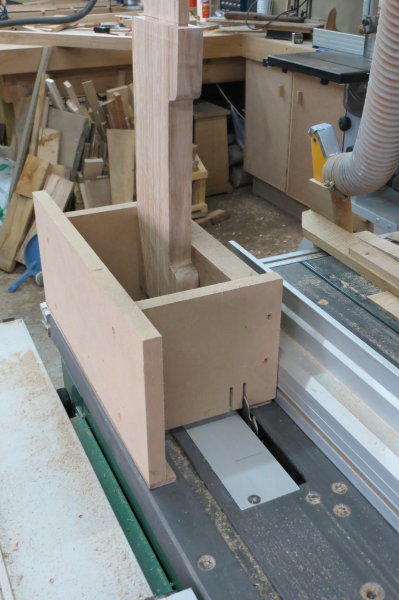
Then I cut the matching mortices (12mm, 35mm deep) using the router in a router box to give me a bit more stability.
Managed to make one front and one back corner post OK (have been known to make two identical !).
Then did a quick dry assembly :
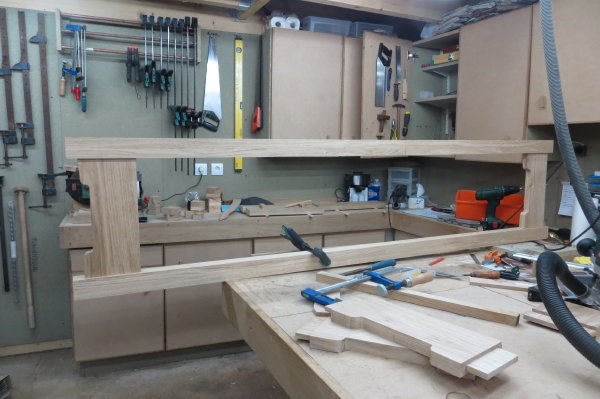
Next step will be to rout or TS a slot for the side panel. I will also add a bracing cross member in the middle, but it will be on the inside edge, hidden behind the panel and will also serve as a shelf support for the middle shelf which will be fixed to brace the middle of the cabinet.
2016, may 31st
Finished the afternoon yesterday cutting the slots for the floating side panels. Quite simple in principle, but a lot of material to remove to create an 8mm slot 175 x 36cm. Cut the short parts on the TS, three passes with a 3mm blade, then routed the long parts as I was not confident to control the 2m long corner sections well enough to make stopped cuts on the TS.
Also made the two central cross braces and routed the appropriate mortices.
Today I started making up the side panels. These will be in chestnut - I like the "cathedral window" grain and a slightly different tint will look good I believe.
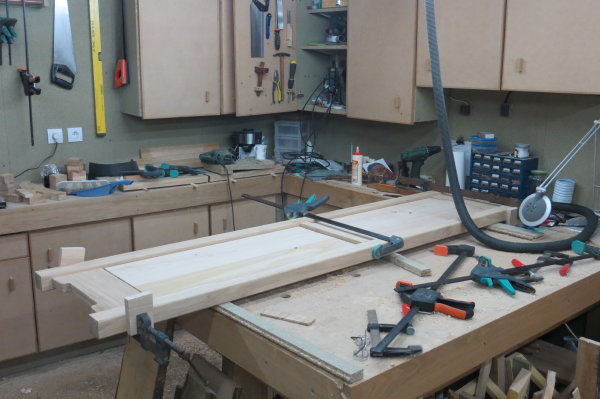
Some 25mm live edge boards planed up to 18mm, then biscuit jointed for alignment and glued up. Note the central section of the bench removed to allow clamping both sides of the job to the bench top to keep everything perfectly flat, this is one of the key advantages of this bench arrangement.
2016, june 2nd
Spent this morning trimming the panels to size and then routing the rebate on the back edge to get down to the 8mm slot size.
This afternoon much planing, scraping and sanding to get all the parts for one end of the bookcase up to standard and then the first glue up ! Went rather well, there are big shoulders on the wide cross members that pull it all into square without much intervention by me. Just a tap with a mallet to settle the tenons into the mortices. ![]()
![]()
The outside is face down in this pic so we are looking at the inside of the side...
2016, june 16th
Lots of other stuff going on at the moment, so progress is slow, but I have now made the floating panels for both sides and assembled them.
2016, september 20th
It's been a while !!! What with holidays, organising a photo exhibition, fitting out the kitchen in Isabelle's investment appartment and numerous other distractions, I've not done much to the project during the summer. The last week however, there is finally some real progress.
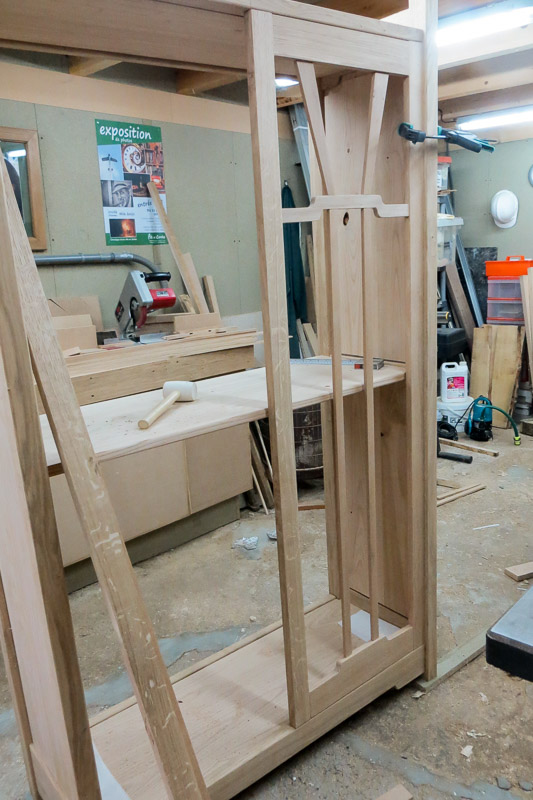
The first steps were to prepare the oak frame members for the top and bottom and create the (chestnut) floating panels that sit in them. Lots of milling up of boards, lots of profiling for the cloud lifts - then cutting the big mortices in the side assemblies to take the top/bottom frames. Mortices cut with a router, the assemblies were far to big to manipulate in the hollow chisel morticer. Then assemble the top/bottom and central shelf with two sides : on trestles as it fouled the lights when I tried to assemble it on the bench top. The central shelf is M&T'd and glued into frame members at the front (free to expand etc at the back) to ensure the front of the cabinet does not bow in or out and so avoid potential problems with the doors
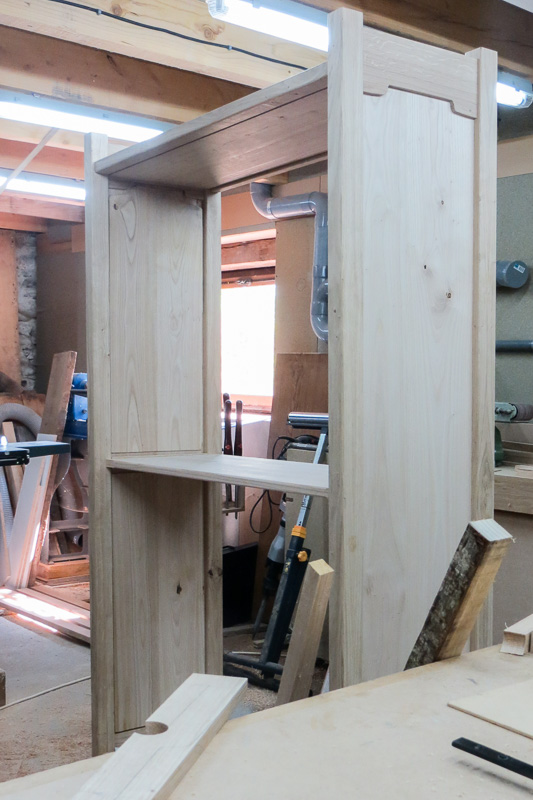
A simple job in principle, but it's big (almost 2m tall) and everything is VERY heavy, I nearly had a disaster when I found it was a tad out of square and I had no clamps long enough to reach corner to corner to pull it into line. Frantic improvisation using a loop of rope and a stick to twist it like a tourniquet !!
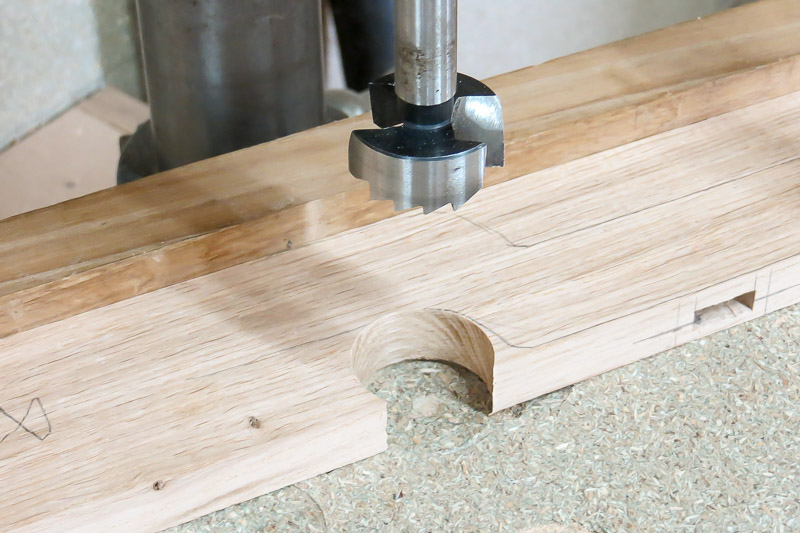
Next job : the doors. These are glazed with fancy muntins in the style of G&G, and since I didnt fancy cutting glass around these fairly complex shapes, the muntins are on the surface of a single rectangular glass panel. The cloud lifts are done by drilling the main parts of the curves with forstner bits, then cutting into the curves with the bandsaw, finally faired by hand sanding.
Getting the angles right on the muntins was quite tricky, in the end I simply made a full scale drawing and cut them to fit. All M&T'd into place even if they are only decorative.
I always cut mortices on the hollow chisel morticer where possible, then fine tune tenons to fit. I cut the shoulders on the TS using a crosscut sled, then cut the cheeks on the bandsaw. A trick I've found useful is to cut the tenons over long, then creep up on the bandsaw setting using the actual cheeks, but only cutting in the overlength bit. Once it all fits right, I cut the rest of the cheeks and trim off the end bit.
First door assembled today : here it is propped in the cabinet and secured with a clamp until I fit the hinges.
Now for the second door...
2016, october
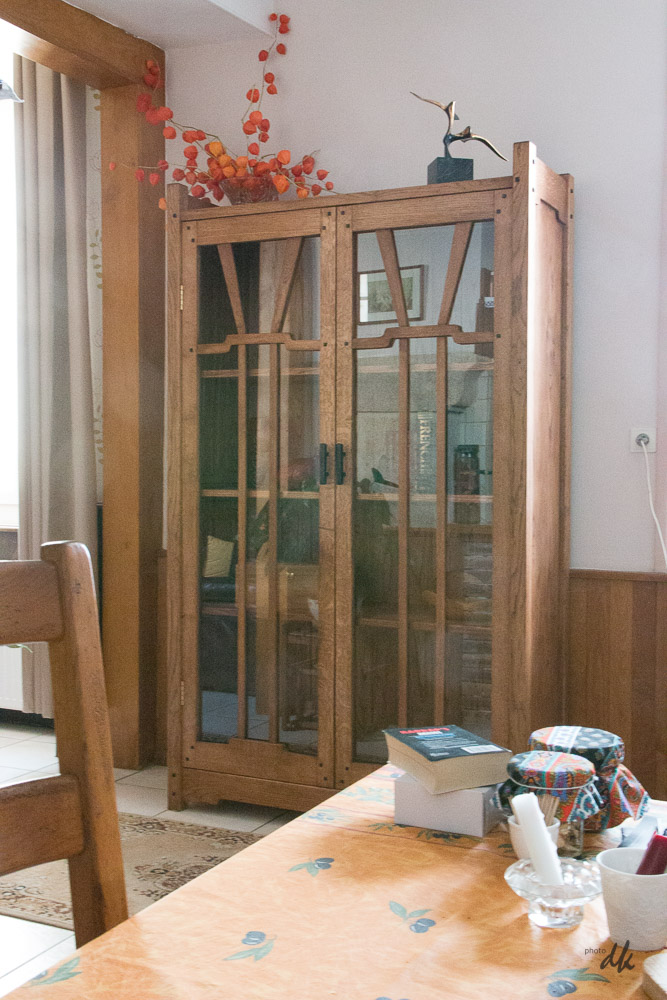 It's now in place !
Isabelle's son helped me move it - even with the doors off it is VERY heavy. It was difficult to say the least, neither of us would admit that we were struggling but we were !
It had to be turned on its side to pass the doors as it's over 2m tall, then had to be stood back up to when in the right place. Fortunately there are high ceilings at Rue Darnet or it the diagonal might not have fitted between floor and ceiling.
A wall to enclose the courtyard
2016, march 3rd
Our front courtyard is open to the road. Because it's "access residents only" there is no big deal with traffic/parking etc, but it still felt rather open and exposed. On top of that, the view is to a rather tatty property some 100m away on the other side of a main road, so we felt we wanted some form of screening.
The first step (oct 2015) was to buy some shrubs and small trees and plant a border along part of the boundry. Ha! Big joke ! After quite a while with a pick axe breaking through the tarmac and underlying hardcore, I found.... SOLID ROCK. Discussion with the neighbours confirmed it, the house is built straight onto solid rock. We have a large garden, but it is at the side of the house and some 3m higher up the slope. I should have realised, you can clearly see the base of the house walls and the start of the rock below when down in the cellar which has been carved into the rock. So we planted the trees and shrubs in the garden and thought again.
In the end we decided on a wall, but double, with the two walls spaced by 80cm to allow us to fill the space with soil and plant. Planning approval gained, i started in march 2016 by buying a breaker to tackle the foundations. I looked at hiring one, but I could buy one for the price of 2 days hire and while it probably wont last for 30yrs, it will do all that I want.
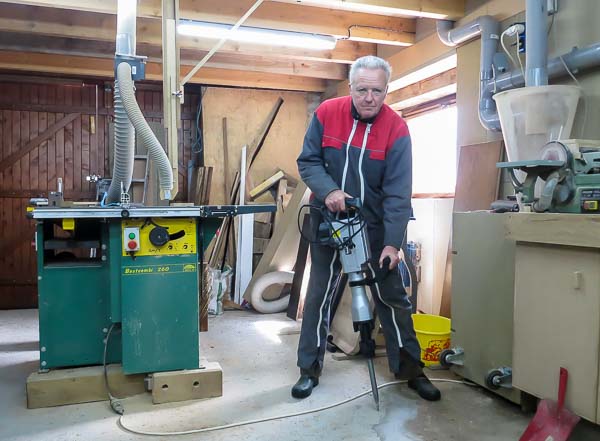
Road test result : awesome !! Chewed through a large lump of concrete in seconds. ![]()
![]()
It's quite a bit heavier than I thought, I was sure I'd read 15kg somewhere, but when I picked it up in the shop I thought : "must be getting feeble - it seems dead heavy for 15kg". Then I read the label on the box : 24.4kg.
Sadly I have to bend to use it, but at 6' 2" that seems to be the way of things - note the plinth under my TS to get it to a sensible height !
Rainy today, so tested it between showers and hence the indoor photo. First decent dry day and we make a start.
2016, april 1st
No really, it was april 1st ! Started digging out the tarmac and the hardcore using the new beast. No problem, first trench opened up and the material removed in an hour or two. 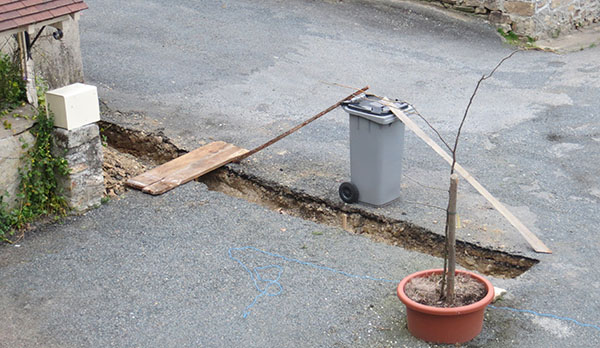
No need to dig very deep, just enough to get down to the bedrock - around 40cm, then fill with concrete plus a reinforcing bar assembly. Notice the small tree in the tub - best we could do with a hole only 30-40cm deep - bury the bottom half of the tub !
Work proceded bit at a time when I had the motivation. Typically doing a day's excavation at a time or, later in the project, a days block laying. The structure was finally finished in october 2016 ready for planting shrubs and trees in the autumn. For some reason I dont seem to have taken progress photos, but here it is as at febrary 2017 partially planted and awaiting a render to hide the concrete blocks. Planning permission specifies render to match the house.


The pillars are pre-cast hollow concrete forms filled with concrete and reinforced with four 8mm rebar set into the foundation.
Best not to knock them with the car !
The most interesting part of the whole project was getting the foundation of the part on the left of the entrance, which is partly below ground due to the slope, at the same level as the foundation of the part on the right which I'd already built. Cant use a simple level since the part you need to check is below ground... I ended up using a water level - a piece of clear plastic tube filled with water and draped across the area in question with the ends secured to two temporary posts in the bottoms of the foundations.
The "fence" part is in oak with the rails m&t into the posts and secured with drawbored pegs.